Save
Save There's something about the smell of espresso hitting hot cream that makes you pause mid-morning and think about dessert instead. I was standing in my kitchen, reheating leftover coffee, when it hit me—why not build an entire frozen sandwich around that exact moment? That rich, slightly bitter coffee aroma swirled with vanilla bean cream felt like it deserved its own celebration, something you could hold in your hand and savor slowly.
I made these for my roommate's birthday party last spring, and honestly didn't expect them to vanish in ten minutes. Someone asked for the recipe with their mouth full, which is my favorite kind of compliment. That moment when people pause mid-conversation just to eat something you made—that's when you know you've nailed it.
Ingredients
- Unsalted butter (1 cup, softened): Room temperature butter creams better and traps air, making cookies tender rather than dense—don't skip the softening step.
- Light brown sugar and granulated sugar (1 cup plus 1/2 cup combined): The brown sugar brings moisture and depth, while white sugar helps structure; using both gives you the best texture.
- Large eggs (2): These bind everything and add richness; room temperature eggs mix more smoothly into the creamed butter.
- Instant espresso powder (2 tbsp): This is where the coffee magic happens—it dissolves into the dough and gives you that café flavor without making cookies taste bitter.
- Vanilla extract (1 tsp for cookies): A small amount rounds out the flavors; don't use imitation if you can help it.
- All-purpose flour (2 cups): Measure by weight if possible to avoid packing flour down, which makes cookies tough.
- Unsweetened cocoa powder (1/2 cup): This deepens the coffee flavor and adds subtle richness without making cookies taste like chocolate.
- Baking soda (1 tsp) and salt (1/2 tsp): Baking soda helps cookies spread gently and rise slightly; salt is your flavor amplifier.
- Heavy cream (2 cups) and whole milk (1 cup): The cream makes ice cream luxurious; whole milk keeps it from becoming too dense.
- Granulated sugar (3/4 cup for ice cream): This sweetens the cream base without adding any color or moisture.
- Vanilla bean (1 whole, split) or vanilla bean paste (2 tsp): Real vanilla bean brings those tiny flecks and a pure, clean flavor that bottled extract can't quite match.
Tired of Takeout? 🥡
Get 10 meals you can make faster than delivery arrives. Seriously.
One email. No spam. Unsubscribe anytime.
Instructions
- Heat your oven and prep your workspace:
- Set your oven to 350°F (175°C) and line two baking sheets with parchment paper so cookies don't stick. Having everything ready before you start mixing means you're not scrambling with hot dough.
- Cream the butter and sugars:
- Beat softened butter with both sugars for about 2 minutes until the mixture looks pale and fluffy—this is where air gets trapped, making cookies tender. You'll see the color lighten noticeably.
- Add eggs and espresso magic:
- Drop eggs in one at a time, beating well after each addition so the mixture stays smooth and silky. Stir in espresso powder and vanilla extract until you smell that deep coffee aroma throughout the bowl.
- Mix the dry ingredients separately:
- In another bowl, whisk flour, cocoa powder, baking soda, and salt together; this distributes the leavening evenly. Gradually fold this into the wet mixture until you have a soft, chocolate-colored dough.
- Shape and bake the cookies:
- Scoop dough onto prepared sheets about 2 inches apart, then gently flatten each one with your palm—they'll spread a bit more in the oven. Bake for 10 to 12 minutes until the edges look set but the center still feels slightly soft to the touch; they'll firm up as they cool.
- Make the vanilla bean base:
- Combine heavy cream, milk, sugar, vanilla bean seeds, and salt in a saucepan over medium heat, stirring occasionally until steam rises and sugar dissolves completely. Don't let it boil or the cream may scald and taste slightly burned.
- Chill and churn:
- Let the cream mixture cool to room temperature, then refrigerate until cold. Pour into your ice cream maker and churn according to the manufacturer's instructions—usually 20 to 30 minutes—until it reaches soft-serve consistency, then freeze solid for 2 hours.
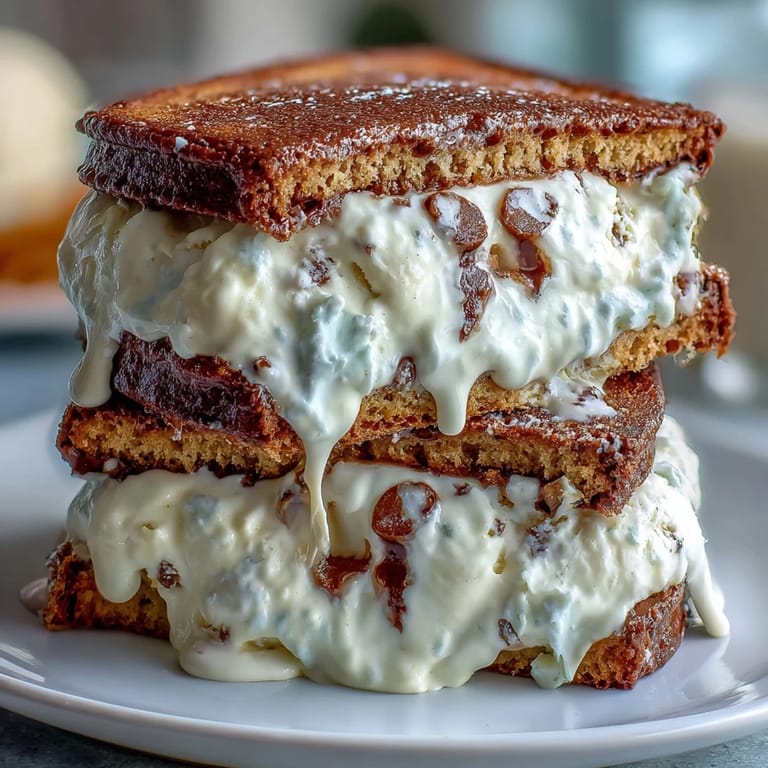
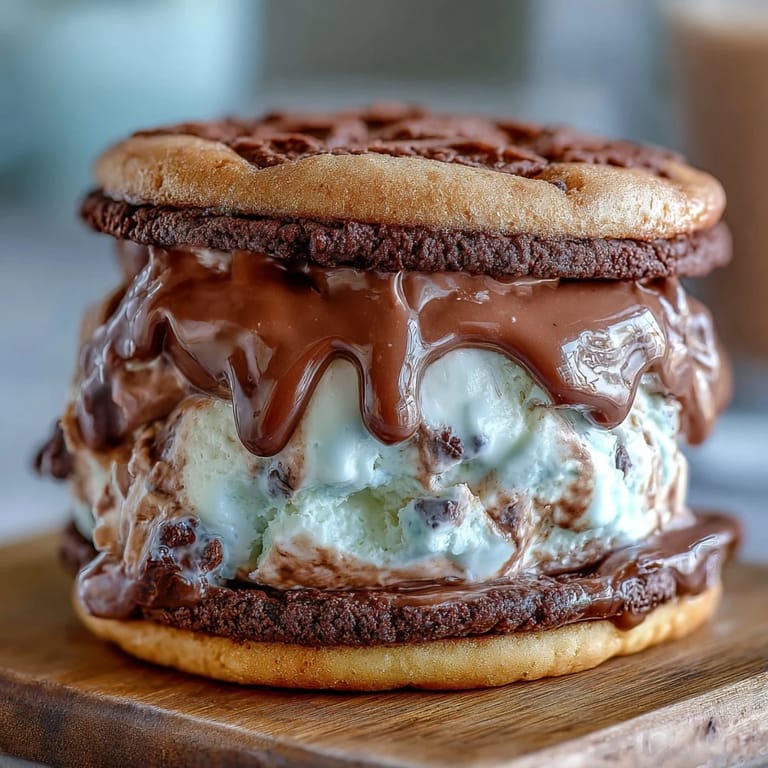
- Assemble your frozen sandwiches:
- Place a generous scoop of ice cream on the flat side of one cookie, press a second cookie on top gently but firmly, and repeat with remaining cookies. Freeze the finished sandwiches for at least 30 minutes so the ice cream doesn't squish out when you bite into them.
 Save
Save What surprised me most was how the cookie flavor actually improved after a few days in the freezer—the espresso got rounder, more mellow, less sharp. It became something you'd crave at 10 p.m. on a random Tuesday, not just something fancy for special occasions.
The Coffee-Cookie Chemistry
Espresso powder in baked goods doesn't taste like drinking coffee; it tastes like depth. The cocoa powder adds richness without chocolate flavor, so together they create something almost savory underneath the sweetness. The cookies themselves stay tender and chewy because of the brown sugar and soft baking time—they're more like soft shortbread than crispy wafers, which matters when ice cream is melting between them.
Making Vanilla Bean Work for You
Real vanilla bean costs more, but those tiny black specks in your ice cream do something psychological—they signal quality and care. If you can't find vanilla beans, vanilla bean paste works almost as well; just avoid regular vanilla extract, which tastes sharp and thin next to homemade ice cream. The cream mixture needs time to cool because temperature matters for churning; warm base churns unevenly and doesn't freeze properly into that creamy texture.
Storage and Simple Upgrades
These sandwiches keep beautifully for up to two weeks in an airtight freezer container, making them perfect for preparing ahead of gatherings. The cookies stay soft rather than getting icy or stale, and the ice cream never develops that grainy texture frozen desserts sometimes get.
- Roll the sandwich edges in mini chocolate chips or crushed espresso beans right after assembly for texture and flair.
- If you don't have an ice cream maker, quality store-bought vanilla bean ice cream works perfectly and cuts your prep time in half.
- Let sandwiches sit at room temperature for 2 to 3 minutes before eating if you want the cookies a bit softer and the ice cream easier to bite through.
 Save
Save These sandwiches taste like someone spent real time on you, even though the actual hands-on work is under an hour. That's the whole point.
Recipe FAQs
- → How do I achieve soft yet sturdy coffee cookies?
Use a combination of brown and granulated sugars and avoid overbaking by removing cookies when they are set but still soft. Allow cooling on a wire rack for firmness.
- → Can I make the vanilla bean ice cream without an ice cream maker?
Yes, you can use a high-quality store-bought vanilla bean ice cream or freeze the churned mixture in a shallow container, stirring periodically for creaminess.
- → What’s the best way to store the assembled sandwiches?
Place them in an airtight container and keep frozen for up to two weeks to maintain freshness and texture.
- → Can I enhance the sandwich edges with extra flavors?
Rolling the edges in mini chocolate chips or crushed espresso beans adds texture and a flavor boost.
- → What allergens are present in this treat?
Contains dairy, eggs, gluten, and may have traces of soy if certain chocolate chips are used. Always check ingredient labels.