 Save
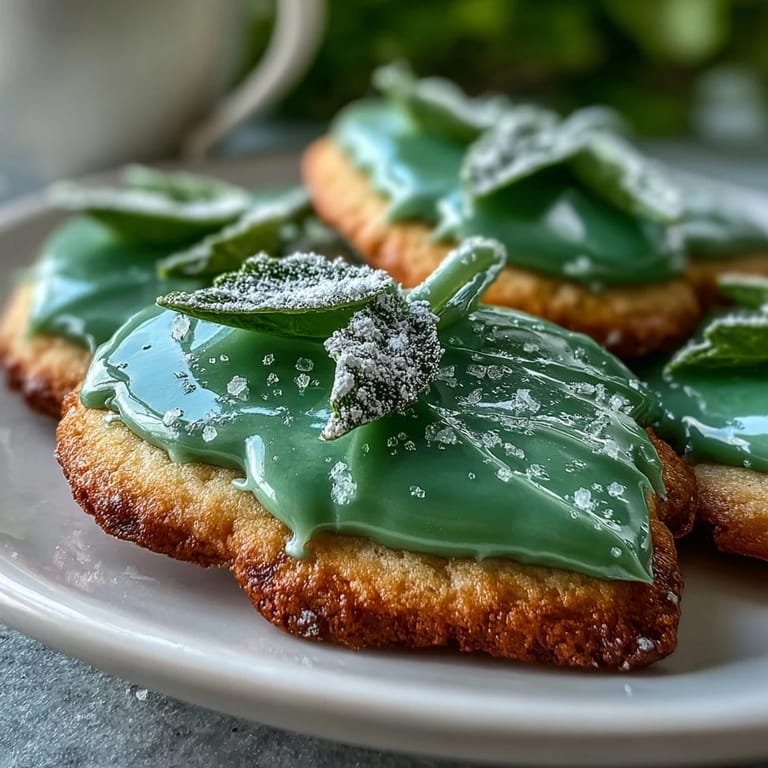
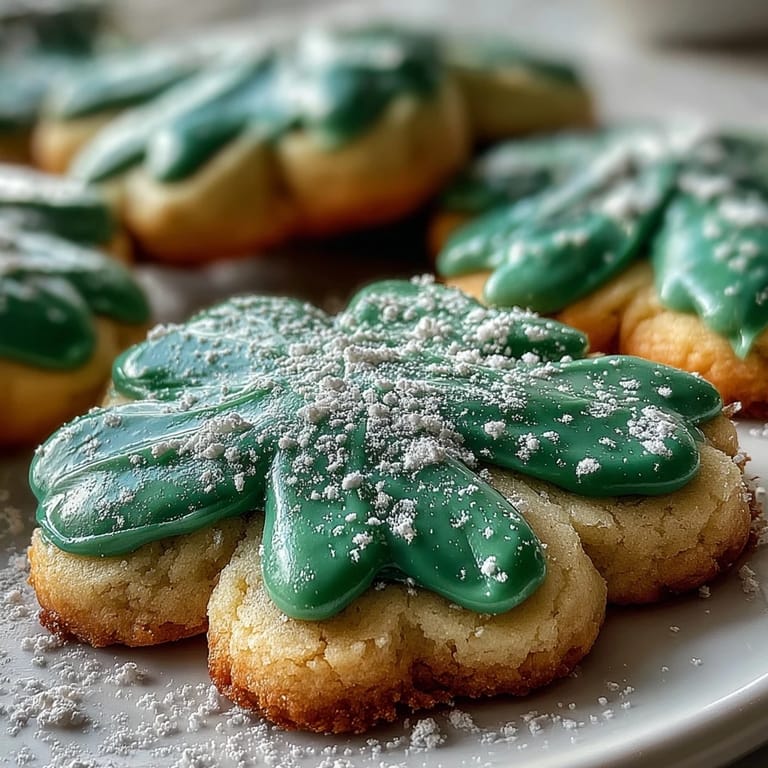
Save There's something magical about baking cookies on a gray March afternoon when the kitchen suddenly fills with the scent of vanilla and butter. My daughter pressed her face against the window one St. Patrick's Day, watching the rain, and asked if we could make shamrock cookies that didn't taste like mint. That question stuck with me, and I realized the best festive cookies are the ones that taste like pure buttery joy, dressed up in holiday colors. These sugar cookies became our tradition that year, and they've stayed on our St. Patrick's Day table ever since.
I still think about the year my mom arrived for St. Patrick's Day dinner early and found me elbow-deep in green icing, with more on my apron than on the cookies. She laughed, grabbed a piping bag, and we decorated in comfortable silence for an hour, the cookies piling up on the cooling rack. That's when I understood these aren't just cookies—they're an excuse to sit with someone you love and make something beautiful together.
Ingredients
- All-purpose flour (2 1/2 cups): The foundation of these cookies; sifting it together with baking powder and salt ensures they'll be tender, not tough.
- Unsalted butter (3/4 cup), softened: Softened butter beats in faster and creates that light, fluffy texture that makes these cookies melt on your tongue.
- Granulated sugar (1 cup): This is what gives the dough structure and that subtle crisp edge when baked.
- Egg (1 large): Brings everything together while keeping the cookies moist and tender.
- Vanilla extract and almond extract (2 teaspoons and 1/2 teaspoon): The almond extract is optional but adds a whisper of depth that makes people ask what's in them.
- Powdered sugar (3 cups, sifted): For the icing; sifting removes lumps and gives you that smooth, glossy finish.
- Egg whites or meringue powder with water: The base of royal icing; egg whites give it shine, while meringue powder is safer if you're concerned about raw eggs.
- Green gel food coloring: Gel colors don't thin the icing like liquid colors do, keeping your icing consistency perfect.
Tired of Takeout? 🥡
Get 10 meals you can make faster than delivery arrives. Seriously.
One email. No spam. Unsubscribe anytime.
Instructions
- Mix the dry base:
- Whisk flour, baking powder, and salt in a medium bowl, breaking up any little lumps. This takes less than a minute but sets you up for success.
- Cream butter and sugar:
- Beat them together for 2 to 3 minutes until it's pale and fluffy—this is where the magic starts. Stop when it looks like soft clouds.
- Add the wet ingredients:
- Mix in the egg and extracts until you can't see any streaks of egg. This usually takes about a minute on medium speed.
- Bring it together:
- Slowly pour in the dry mixture while mixing, stopping as soon as you don't see any white streaks. Over-mixing toughens cookies, so resist the urge to go wild here.
- Chill the dough:
- Divide dough in half, flatten into disks, wrap tightly in plastic, and refrigerate for at least an hour. This prevents the dough from spreading too much in the oven and keeps the shamrocks defined.
- Roll and cut:
- Preheat your oven to 350°F, dust your work surface lightly with flour, and roll dough to about 1/4-inch thick. Cut shamrocks and place them on parchment-lined baking sheets, leaving a little space between each one.
- Bake to golden:
- Bake for 9 to 11 minutes—you're looking for just the tiniest hint of gold at the edges, not brown. The cookies keep cooking slightly after you pull them out, so don't overbake.
- Cool strategically:
- Leave cookies on the baking sheet for 5 minutes so they firm up slightly, then move them to a wire rack to cool all the way. This keeps them from getting too soft.
- Make the royal icing:
- Beat powdered sugar, egg whites or meringue powder mixture, and vanilla together for about 5 minutes until stiff peaks form and the icing is glossy. You'll know it's ready when you lift the beaters and the icing holds its shape.
- Tint and prepare:
- Divide icing into bowls and add green gel food coloring drop by drop until you reach your perfect shade. Transfer to piping bags with small round tips.
- Decorate with care:
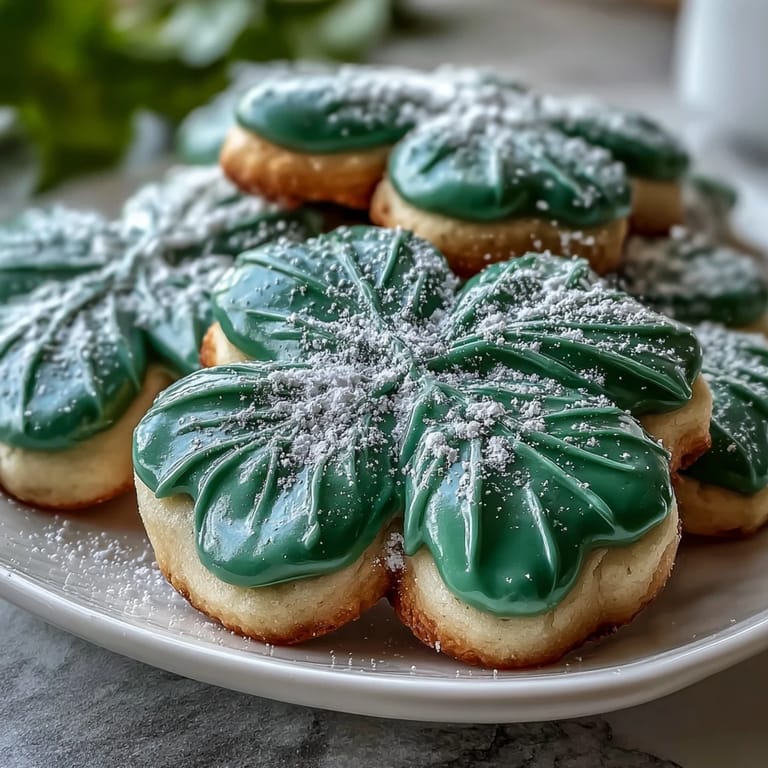
- Pipe an outline around each shamrock first, then flood the middle with icing thinned with a little water. If you want sprinkles or glitter, add them before the icing sets.
- Let it set:
- Give the icing at least an hour to harden before stacking or packaging cookies. Patience here prevents smudged designs and broken cookies.
 Save
Save One year, my sister showed up unannounced on St. Patrick's Day morning, and we stayed in the kitchen from sunup until we had to leave for dinner, piping shamrocks and talking about everything—jobs, kids, dreams, worries. The cookies were almost secondary; what mattered was the rhythm of it, the gentle clink of the piping bag against the bowl, the laughter when one of us made a particularly lumpy shamrock. These cookies taught me that some of the best moments in a kitchen aren't about the food at all.
The Texture You're Aiming For
Sugar cookies should be tender with a slight crispness at the edges—not soft like cake, not hard like shortbread. The key is not opening the oven door too early and pulling them out when they're still pale, because they continue to bake from residual heat. I learned this the hard way by overbaking my first batch and ending up with cookies that were more like biscuits than butter clouds.
Royal Icing Done Right
Royal icing looks intimidating but it's really just three ingredients beaten into submission until it looks glossy and holds stiff peaks. The consistency matters—if it's too thick, you'll tear the cookies trying to pipe; if it's too thin, it'll run right off. The sweet spot is when it flows smoothly but holds its shape, and you learn this by watching it carefully as you beat it.
Decorating Secrets and Quick Notes
Piping an outline first and then flooding with slightly thinner icing is the trick that makes your cookies look bakery-perfect. It takes a little longer but prevents blobbiness and gives you that clean, polished look. Some people add a tiny drop of water or corn syrup to thin the flooding icing just enough to spread easily, which I started doing after my third batch turned out better than my first.
- If your icing looks grainy or thick, beat it for another minute—it's probably not quite at stiff peaks yet.
- Make royal icing up to two days ahead and keep it covered at room temperature; stir it back to life before using.
- Green gel coloring can stain your hands, so keep a damp cloth nearby and don't panic—it washes off.
 Save
Save These shamrock cookies have become less about the holiday and more about the excuse to gather in the kitchen with people you love. Make them, decorate them slowly, and enjoy the time it takes.
Recipe FAQs
- → What makes the cookies soft yet sturdy?
The balance of butter and sugar, combined with chilling the dough, ensures the cookies hold their shape while remaining tender.
- → How is the shiny royal icing achieved?
Whipping powdered sugar with egg whites or meringue powder creates stiff peaks and a glossy finish perfect for decorating.
- → Can I add flavors to the cookie dough?
Yes, vanilla extract is standard, and almond extract can be added for subtle depth but can be omitted if desired.
- → How do I keep the icing from cracking?
Allow cookies to cool completely before icing and let the decorated cookies dry slowly at room temperature for best results.
- → Are there alternatives to egg whites in icing?
Meringue powder mixed with water can be used as a convenient substitute for egg whites in royal icing.