 Save
Save I'll never forget the year my grandmother first taught me that a cheese board could be art. It was a crisp December afternoon, and she pulled out her finest cheeses while snow began to fall outside her kitchen window. She handed me a sharp knife and smiled, saying, "Let's make something that looks like the forest we're watching." That's when the Tannenbaum Border was born—a festive row of cheese trees that turned a simple appetizer into a conversation piece. Now, whenever I arrange these delicate triangles, I'm transported back to that moment, creating beauty with someone I love.
I remember serving this at my first dinner party as a young adult, terrified that nobody would notice my efforts. But the moment guests arrived and saw those little cheese trees bordering the board, the whole room lit up. Someone gasped and said it looked too pretty to eat. That's the magic of this border—it's not just food, it's an invitation to celebrate together, and it works every single time.
Ingredients
- Semi-firm cheese (Gouda, Edam, or Emmental), 250 g, well chilled: The key here is choosing a cheese that's firm enough to slice cleanly into delicate triangles but not so hard it shatters. I learned this the hard way after trying brittle aged cheddar. Chill your cheese for at least an hour before slicing—cold cheese is forgiving cheese.
- Small green seedless grapes, 150 g, washed and thoroughly dried: These little emeralds are what bring the whole forest to life. Drying them completely is non-negotiable; any moisture will make them slip around the board like tiny rebels. Pat them gently with a clean kitchen towel and let them air dry for a few minutes.
Tired of Takeout? 🥡
Get 10 meals you can make faster than delivery arrives. Seriously.
One email. No spam. Unsubscribe anytime.
Instructions
- Chill and prepare your canvas:
- Start with a sharp chef's knife and a cold cutting board. Your cheese should be so cold it's almost frosty to the touch. This is your secret weapon for crisp, clean slices that won't crumble or tear.
- Slice the cheese into pine tree shapes:
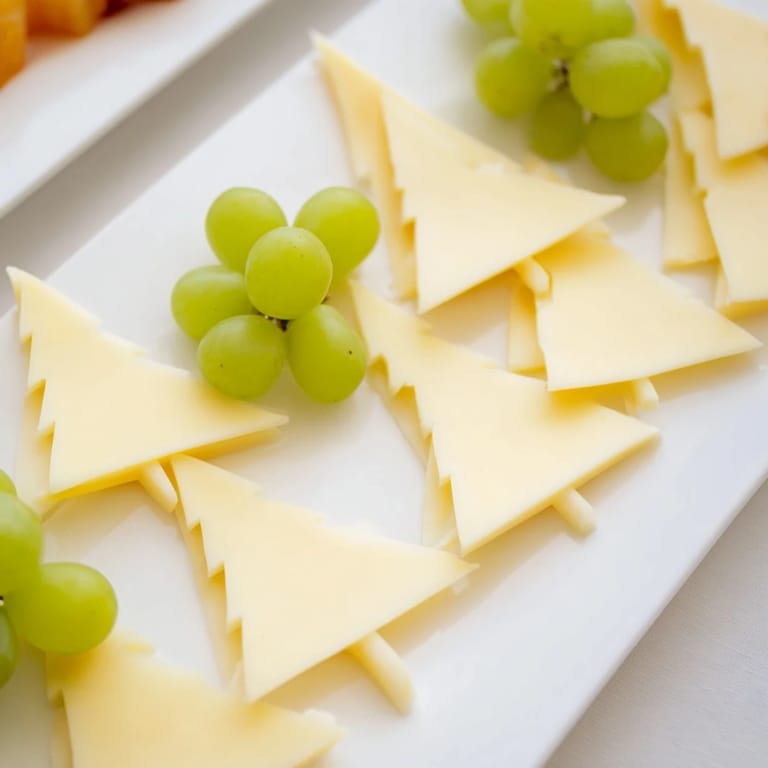
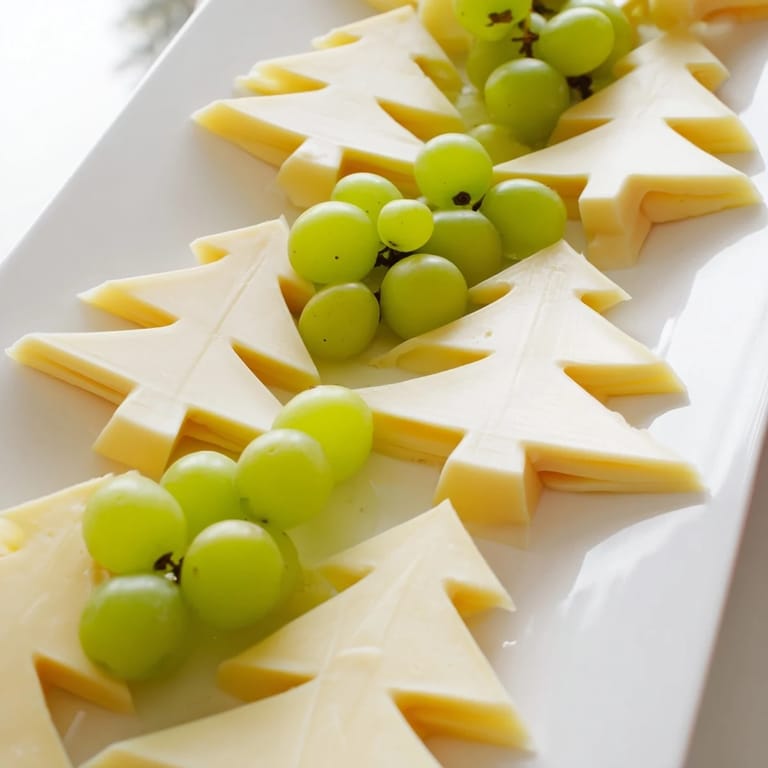
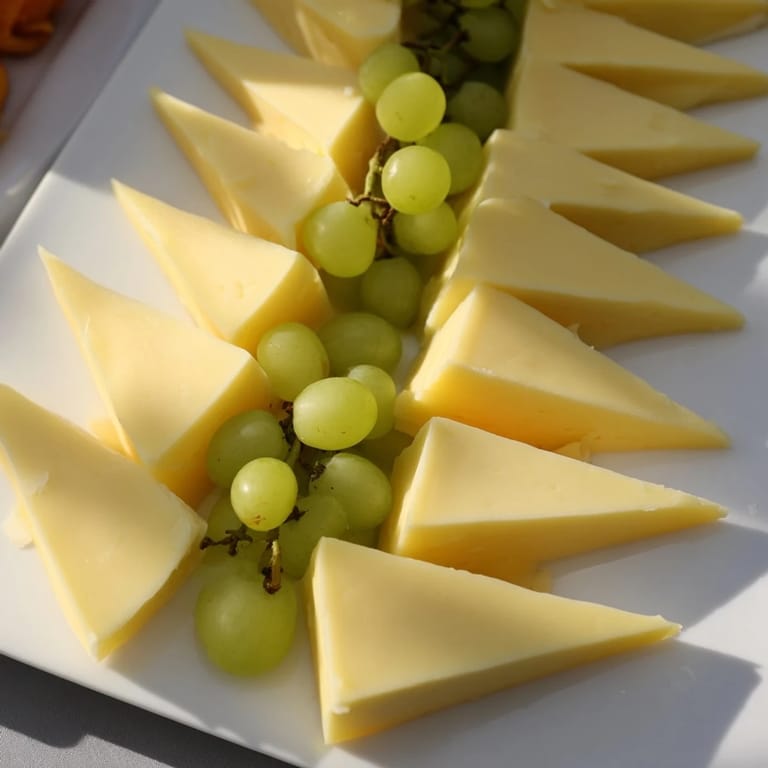
- Cut thin triangular slices, about 5 to 6 centimeters long and roughly 1 centimeter wide at the base. Imagine you're carving tiny evergreens. Each slice should feel delicate in your hands, almost translucent at the edges. The slight imperfections are what make them look natural and charming.
- Arrange the border with intention:
- Take your largest serving platter or wooden board and start positioning your cheese triangles along all four edges, points facing outward like a protective forest surrounding your spread. Work slowly and step back often to see the pattern emerge. You're not just placing cheese—you're creating a frame for generosity.
- Nestle the grapes:
- Tuck those plump green grapes into the gaps between your cheese trees, tucking them snugly so they nestle into the spaces. This is where the board really comes alive. The contrast between the creamy ivory cheese and the jewel-toned grapes is pure holiday magic.
- Fill the center with festive treasures:
- Now the border is your frame, and the center is your gallery. Arrange your favorite cheeses, cured meats, crackers, nuts, and dried fruits in the middle. The border keeps everything organized and makes even a casual selection look intentional and celebratory.
 Save
Save Last Christmas, a young child pointed to the cheese border and said, "You made a forest for the food." In that moment, I realized this wasn't just about presentation—it was about creating wonder. That's what this simple arrangement does. It reminds us that the care we take in our kitchens matters, and that beauty and nourishment go hand in hand.
The Art of Cheese Board Design
A good cheese board tells a story, and the Tannenbaum Border is your opening chapter. When you frame your spread with these elegant triangles, you're signaling to your guests that thought and care went into the gathering. The border creates a natural hierarchy that makes even a simple selection of cheeses feel curated and special. I've noticed that when a board is thoughtfully designed, people linger longer, talk more freely, and actually taste the food instead of just grabbing and eating.
Holiday Hosting Made Simple
One of my favorite discoveries over the years is that the most impressive entertaining doesn't require hours of cooking. A beautiful cheese board with a festive border can be prepared in just 15 minutes, yet it looks like you've been fussing all day. This is the secret of confident hosting—choosing things that taste good, look beautiful, and don't steal your joy before guests even arrive. You get to be present, relaxed, and genuinely happy to see people you care about.
Elevating Your Celebration
The Tannenbaum Border works for so much more than just Christmas. I've created versions for winter weddings, New Year's gatherings, and even elegant dinner parties in January when people still crave that festive spirit. The principle is the same—take something simple and frame it with intention. Your guests will remember not just how good the cheese tasted, but how much care you put into making them feel special. Whether you stick with traditional green grapes or venture into pomegranate seeds and red accents for visual drama, this border is your canvas for creative celebration.
- Fresh rosemary sprigs nestled between the cheese trees add an authentic pine forest scent and look absolutely enchanting
- If you're serving this on a wooden board, place a thin layer of parchment underneath to protect the wood and make cleanup a breeze
- This border works beautifully on both large formal platters and intimate smaller boards—scale it to your gathering and your heart
 Save
Save When you place this border on the table and see your guests' faces light up, you'll understand why I keep coming back to it year after year. It's proof that the simplest gestures, made with love and a little creativity, create the moments we remember forever.
Recipe FAQs
- → What cheese types work best for the border?
Semi-firm cheeses like Gouda, Edam, or Emmental are ideal for slicing into clean triangles that hold their shape well.
- → How should the cheese be cut for the border design?
Slice the cheese into thin, triangular shapes roughly 5–6 cm long with about 1 cm wide bases to resemble stylized pine trees.
- → Can I use fruits other than green grapes?
Yes, small red grapes or pomegranate seeds add color variety and complement the green grape accents.
- → How do I enhance the pine tree effect visually?
Arrange the triangles with points facing outward and nestle grapes between them; fresh rosemary sprigs can add a pine needle touch.
- → Is this arrangement suitable for vegetarians and gluten-free diets?
Yes, the border contains only cheese and grapes, fitting vegetarian and gluten-free preferences.