 Save
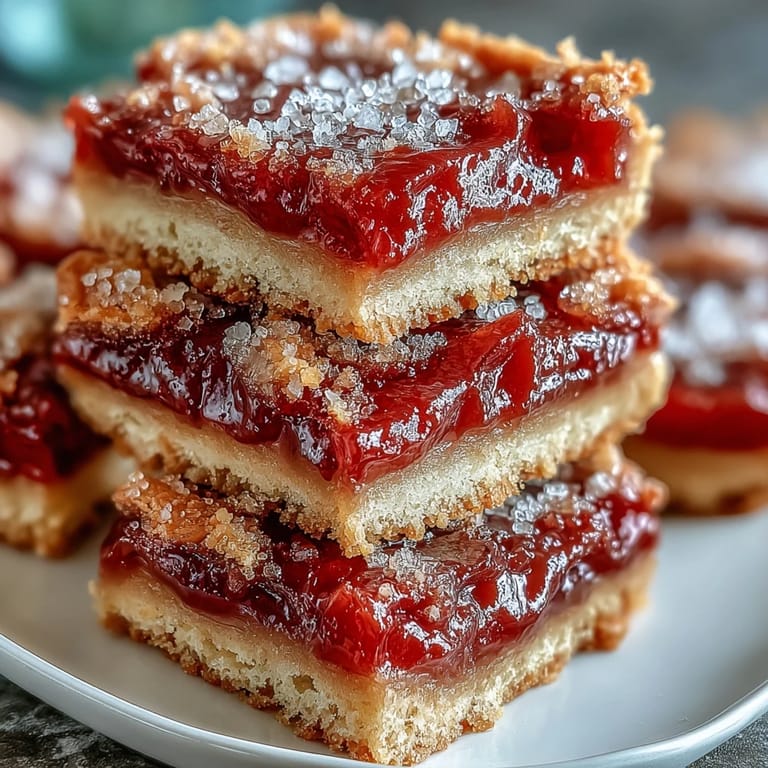
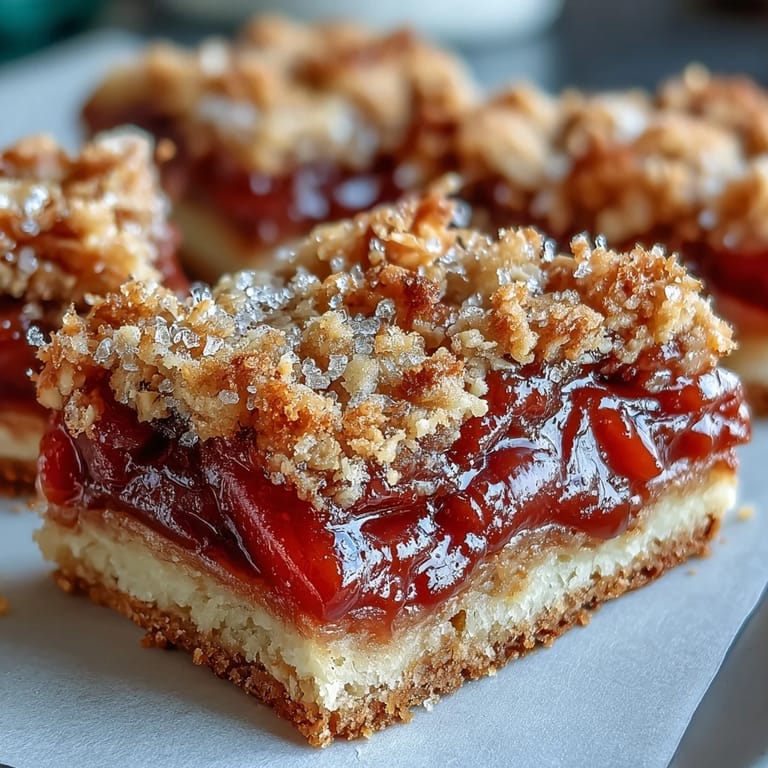
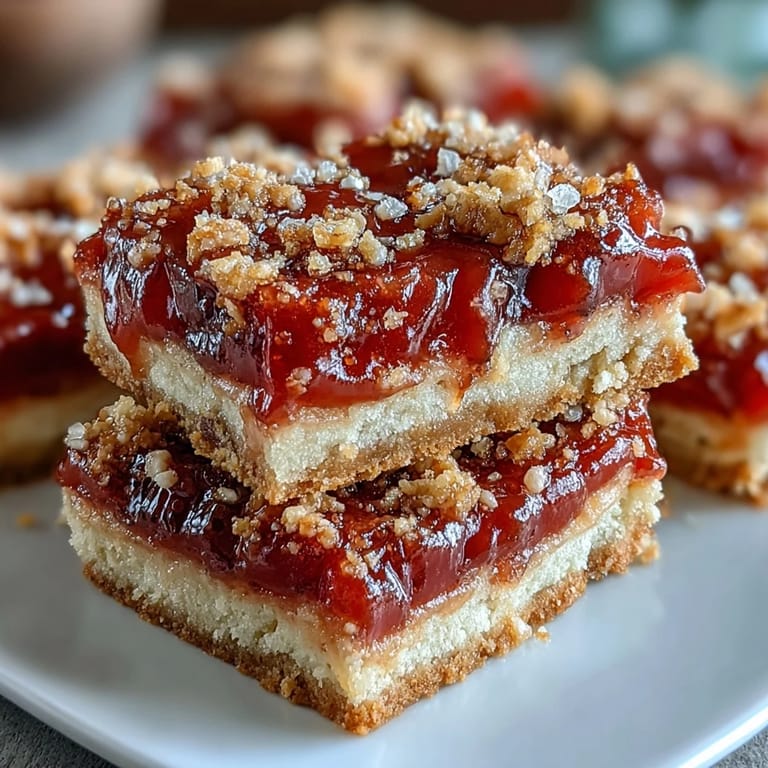
Save My neighbor Maria brought these guava cake bars to a block party on a sticky Miami afternoon, and I watched them disappear faster than the ice in our drinks. She caught me sneaking a third one and just laughed, handing me the recipe scrawled on the back of a grocery list. What struck me most wasn't just how good they tasted—that buttery cake giving way to that deep, jammy guava center—but how simple the technique was once you understood it. I've made them dozens of times since, and they never fail to transport people back to some sun-soaked memory, whether they've ever been to Cuba or not.
I made these for my daughter's school bake sale, and a parent asked for the recipe right there in the gymnasium, still holding the napkin with crumbs on it. That moment—when someone's eyes light up because a dessert brought them genuine joy—that's when you know you've got something worth repeating in your kitchen.
Ingredients
- All-purpose flour (2 cups): Use the spoon-and-level method rather than scooping straight from the bag, or weigh it if you have a scale—this prevents a dense, dry cake.
- Baking powder (1 ½ teaspoons): This is what gives the cake its tender crumb and makes it rise just enough to cushion the guava filling.
- Fine sea salt (¼ teaspoon): Don't skip this; it enhances the sweetness and balances the richness of the butter and eggs.
- Unsalted butter, softened (½ cup): Room temperature butter creams properly with sugar, creating air pockets that keep the cake light and fluffy.
- Granulated sugar (¾ cup): This works with the butter to create structure and that subtle golden-brown top you're after.
- Large eggs, room temperature (3): Cold eggs won't incorporate smoothly, which affects the texture, so pull them out of the fridge about 20 minutes before baking.
- Vanilla extract (1 teaspoon): A small amount adds depth without overpowering the guava, making the whole thing taste more sophisticated.
- Whole milk (⅓ cup): This lightens the batter and keeps the cake from becoming too dense or heavy.
- Guava paste, sliced into thin strips (12 oz): The thinner you slice it, the more evenly it distributes and the easier it is to spread the top layer without disturbing it.
Tired of Takeout? 🥡
Get 10 meals you can make faster than delivery arrives. Seriously.
One email. No spam. Unsubscribe anytime.
Instructions
- Set yourself up for success:
- Preheat your oven to 350°F and line that 8x8-inch pan with parchment paper, making sure it overhangs the sides so you can lift everything out later without wrestling with the pan. I learned this the hard way after trying to cut bars while they were still stuck inside.
- Gather your dry ingredients:
- Whisk the flour, baking powder, and salt together in a medium bowl—this distributes the leavening evenly so you don't get surprises with some bites rising more than others. Set it aside and don't overthink it.
- Cream the butter and sugar:
- Beat them together in a large bowl until the mixture looks pale and fluffy, almost like mousse, which takes about 3 to 4 minutes with an electric mixer. This is where the magic starts; you're literally trapping air bubbles that will make the cake tender.
- Add your eggs one at a time:
- Drop in one egg, beat it in completely, then repeat with the second and third—if you throw them all in at once, they won't emulsify properly and your batter will look grainy. After the last egg, add the vanilla extract and mix until smooth.
- Alternate wet and dry:
- Start with about a third of the flour mixture, beat it in gently, then add a splash of milk, then another third of flour, then milk again, finishing with the remaining flour—this technique prevents overmixing and keeps your cake tender. Stop as soon as everything comes together; you'll see a few streaks of flour are okay.
- Layer your base:
- Spread exactly half the batter into that prepared pan, using a spatula to smooth it into an even layer—this is your foundation, so take a breath and make it level.
- Add the guava treasure:
- Arrange those guava paste strips in a single layer on top, spacing them evenly so every bar will get a piece—think of it like you're creating a stained glass window.
- Top with the second layer:
- Dollop the remaining batter over the guava, then use a damp spatula or slightly damp fingers to gently spread it to the edges, being careful not to squeeze or disturb the guava layer too much. Some streaks showing through are charming, not a mistake.
- Bake until golden:
- Pop it into the oven for 38 to 42 minutes—you're looking for a golden-brown top and a toothpick inserted into the cake part (not the guava, which won't come out clean) should come out with just a few crumbs clinging to it. The guava paste will set more as it cools, so don't overbake.
- Cool with patience:
- Let the whole pan cool completely at room temperature before lifting it out by the parchment—this might take an hour or two, and I know that's hard, but the cake needs to set so the bars hold together when you cut them.
 Save
Save There's something almost ceremonial about cutting these into neat squares, the knife sliding through that golden cake and catching the jewel-red guava inside. My kitchen fills with this sweet, slightly tropical aroma that makes everyone who walks in immediately ask if something's wrong—because how could something this good be sitting in their regular Tuesday afternoon?
The Magic of Guava Paste
Guava paste—that concentrated, sticky treasure—doesn't need to be cooked or processed because it's already been reduced to its sweetest, most intense form. When you layer it into the center of this cake, it stays put and actually helps divide the cake into distinct layers, which is why this method feels almost architectural. The paste softens slightly during baking but keeps its integrity, creating pockets of pure guava flavor that contrast beautifully with the tender, buttery cake surrounding it.
Why This Works Better Than You'd Think
The genius of this recipe is that you're baking the guava paste sandwiched between two protective layers of batter, so it never dries out or burns—it's essentially steamed from below and insulated from above. This means you get to taste the guava in its best state: soft, jammiest, still intensely flavored but not caramelized or darkened. The butter in the dough also prevents the whole thing from sticking to the pan, and the slightly sweet batter echoes the sweetness of the filling without competing with it.
Storing and Serving Your Bars
These bars keep beautifully at room temperature in an airtight container for up to three days, though honestly they rarely last that long in my house. On day two, the flavors have actually deepened—the guava has settled into the crumb a bit more, and the whole thing becomes almost more delicious than it was fresh. They're perfect with coffee, alongside a scoop of vanilla ice cream on a warm evening, or tucked into a lunchbox as an afternoon pick-me-up.
- If you're making these ahead for an event, bake them the day before and store them covered—they travel beautifully and don't dry out.
- For a tropical twist that actually works, add the grated zest of a lime to the batter—it brightens the guava without making it taste citrusy.
- If you're feeling fancy, try mixing a few spoonfuls of cream cheese into some of the guava paste for a richer, more complex filling.
 Save
Save These guava cake bars have become my answer to the question that usually stumps me: what dessert travels well, feels special, and tastes like comfort? They're humble enough for a Tuesday afternoon but refined enough to bring to someone's dinner party, and that's a rare quality to find in a recipe.
Recipe FAQs
- → What makes these bars traditionally Cuban?
Guava paste is a beloved ingredient in Cuban cuisine, often paired with cheese or pastry. The combination of buttery dough with sweet guava filling creates the classic pastelitos de guayaba flavor profile found in Cuban bakeries.
- → Can I make the dough ahead of time?
Yes, the dough can be prepared and refrigerated for up to 24 hours before baking. Bring it to room temperature for easier spreading when you're ready to assemble the bars.
- → How do I know when the bars are done baking?
The top should be golden brown, and a toothpick inserted into the cake portion (avoiding the guava center) should come out clean. The edges may start pulling slightly away from the pan.
- → What's the best way to cut clean bars?
Let the bars cool completely in the pan before removing. Use a sharp knife wiped clean between cuts, or chill for 30 minutes for even cleaner slices that hold their shape well.
- → Can I freeze these guava bars?
Absolutely. Wrap individual bars tightly in plastic and freeze for up to 3 months. Thaw at room temperature for 30 minutes before serving—the texture remains wonderfully tender.
- → What pairs well with these bars?
Serve warm with a scoop of vanilla ice cream or a dollop of whipped cream. They also pair beautifully with Cuban coffee (cafecito) or a glass of cold milk for contrast.