 Save
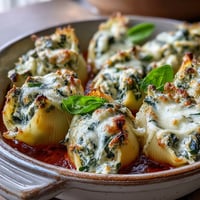
Save My sister called one Wednesday asking if I could bring dinner to her place, and I found myself staring at a container of Greek yogurt thinking there had to be something better than the usual stuffed shells routine. That's when it hit me—what if I swapped the heavy ricotta for something lighter but still creamy, mixed in that basil pesto I always have on hand, and let the chicken do the real work? Twenty minutes later I was folding shredded rotisserie chicken into a filling that tasted indulgent but didn't feel heavy, and honestly, nobody at her table realized they were eating the lighter version.
I made these for a potluck once and watched someone take a second helping, then ask what was different about them—turns out people don't expect something this satisfying to be actually good for them. The combination of that tangy yogurt with the bright basil pesto and tender chicken just works in a way that feels almost too simple to be real, but there it is, bubbling away in the oven and filling your kitchen with this amazing smell that makes everyone wonder what you're up to.
Ingredients
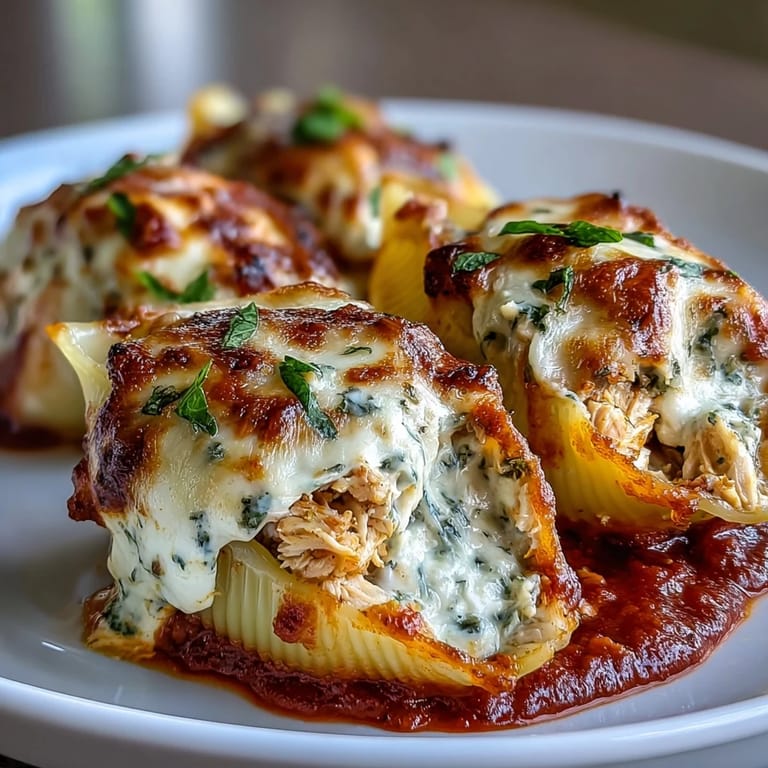
- 12 jumbo pasta shells: Look for the ones that feel sturdy when dry—they'll hold the filling without tearing, and cooking them just until al dente keeps them from turning mushy in the oven.
- 2 cups cooked chicken breast, finely shredded: Use rotisserie chicken if you're short on time and honestly it's just as good; shred it fine enough that it disappears into the filling and creates a smooth texture.
- 1/2 cup plain Greek yogurt: The 2% or nonfat versions work beautifully here and give you that creamy base without the calories of ricotta.
- 1/4 cup prepared basil pesto: Fresh or jarred both work, but taste yours first because some brands run saltier than others.
- 1/3 cup grated Parmesan cheese: Freshly grated makes a real difference in how it melts and blends into the filling.
- 1/2 cup part-skim mozzarella cheese, shredded: This melts into the filling itself while you're mixing and adds richness without going overboard.
- 1 large egg: This acts as a binder and helps everything hold together when you're stuffing and baking.
- 1 garlic clove, minced: Fresh garlic wakes up the filling; don't skip this even though it seems small.
- Salt and black pepper to taste: Season as you go rather than all at once so you don't overdo it.
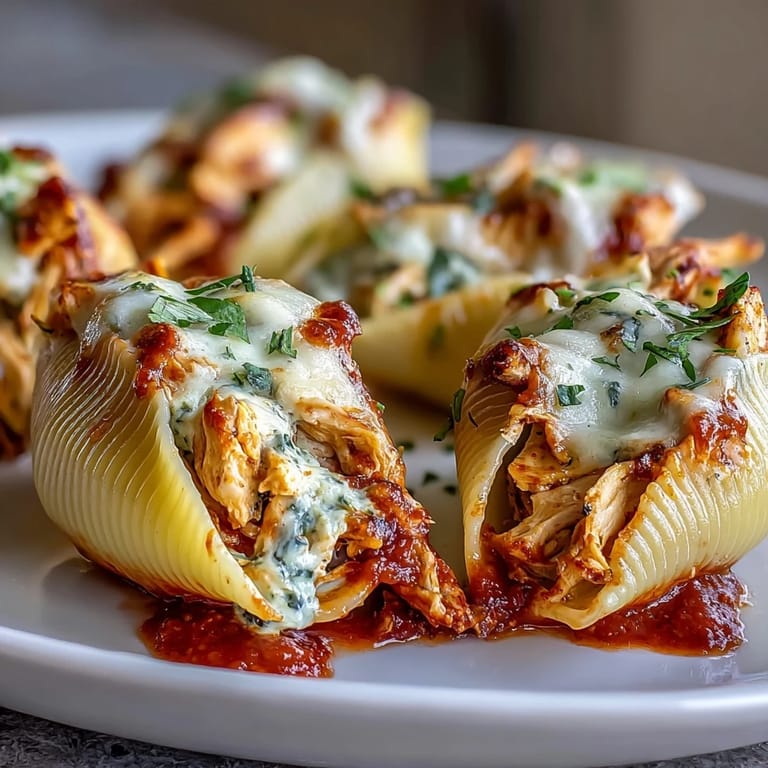
- 2 cups marinara sauce: Your favorite brand works, or make your own if you have time; this is what keeps everything moist during baking.
- 1/2 cup part-skim mozzarella cheese for topping: This gets sprinkled on top before the final bake and creates those little golden spots.
- 2 tablespoons fresh basil for garnish: Totally optional but it brightens everything up when you bring it to the table.
Tired of Takeout? 🥡
Get 10 meals you can make faster than delivery arrives. Seriously.
One email. No spam. Unsubscribe anytime.
Instructions
- Get your oven ready:
- Preheat to 375°F and lightly grease your 9x13-inch baking dish with a bit of oil or cooking spray so nothing sticks.
- Cook the shells:
- Boil a large pot of salted water, add the jumbo shells, and cook until just al dente—they should still have a tiny bit of resistance when you bite them. Drain and let them cool enough to handle without burning your fingers.
- Mix the filling:
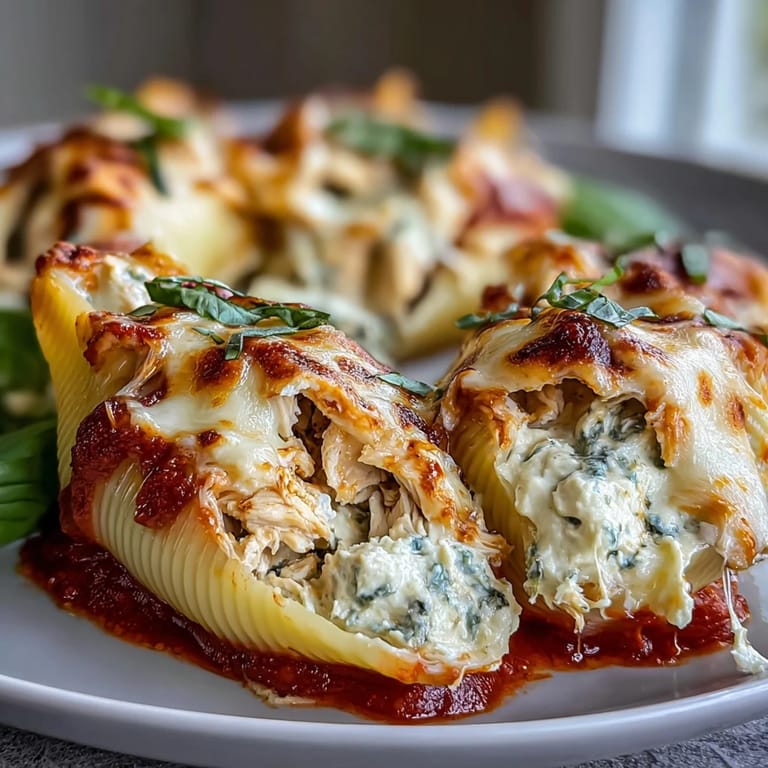
- Combine the shredded chicken, Greek yogurt, pesto, Parmesan, mozzarella, egg, minced garlic, salt, and pepper in a large bowl and stir until everything is evenly mixed and no streaks of yogurt remain. Taste it and adjust seasoning if needed.
- Prep the baking dish:
- Spread about 1 cup of marinara sauce across the bottom of your prepared dish so the shells won't stick.
- Stuff each shell:
- Using a small spoon, fill each cooked shell with roughly 2 tablespoons of the chicken filling and arrange them open side up in the baking dish. Don't worry about making them perfect—they'll all nestle together naturally.
- Add sauce and cheese:
- Spoon the remaining marinara sauce over all the stuffed shells, making sure they're mostly covered, then sprinkle the remaining mozzarella cheese over the top.
- First bake with foil:
- Cover with aluminum foil and slide into the oven for 20 minutes so everything heats through gently without drying out.
- Finish without foil:
- Remove the foil and bake for another 8 to 10 minutes until the sauce is bubbling around the edges and the cheese on top is lightly golden. You'll know it's done when things look inviting and smell absolutely incredible.
- Rest before serving:
- Let it sit for 5 minutes straight out of the oven—this helps everything settle and makes serving easier. Scatter fresh basil on top if you have it.
 Save
Save  Save
Save There's something quietly satisfying about serving this and having people go quiet because they're genuinely enjoying what's on their plate—no apologies needed for eating well, just straightforward deliciousness that happens to be better for you. That's when you know you've nailed a recipe, when nobody's thinking about the lighter swaps and they're just thinking about whether there's enough left for tomorrow.
Making It Your Own
Once you've made this once or twice, start playing with it. I've added chopped spinach that I squeezed dry first, sautéed mushrooms, even sun-dried tomatoes when I had them around. The filling is forgiving enough to accommodate whatever vegetables are looking good at your market, and honestly the variations keep things interesting if you're making this on rotation. Just remember that adding extra vegetables might mean slightly less chicken to keep the proportions balanced and the shells easy to stuff.
Timing and Prep Strategy
You can absolutely make this earlier in the day and refrigerate it before baking—just add 5 to 10 minutes to your bake time if you're going straight from cold. I sometimes assemble everything the morning before and keep it covered in the fridge, then pop it in the oven when I get home. The beauty of this approach is that you're doing the active work when you have time and energy, then the oven does the rest when you need dinner ready.
What to Serve Alongside
These shells are honestly complete on their own, but a crisp green salad with lemon vinaigrette cuts through the richness beautifully and makes the meal feel more balanced. Garlic bread is the obvious move if you want that carb comfort, or you could go with roasted vegetables on the side—whatever feels right for your table. If you're feeling fancy, a dry Italian white like Pinot Grigio pairs surprisingly well and doesn't feel like you're overcomplicating things.
- Make an extra batch of the filling and freeze it—you'll thank yourself later for having it ready.
- Leftover shells reheat perfectly in a 350°F oven covered with foil for about 15 minutes.
- Don't skip the rest time after baking because it really does make plating and serving easier.
 Save
Save  Save
Save This dish landed in my regular rotation because it delivers on comfort without the guilt, and honestly that's the kind of recipe worth keeping around. Make it once and you'll understand why it's worth the little bit of effort.
Recipe FAQs
- → Can I make these ahead of time?
Yes, assemble the stuffed shells up to 24 hours before baking. Cover tightly and refrigerate. You may need to add 5-10 minutes to the baking time if baking cold from the refrigerator.
- → What can I use instead of Greek yogurt?
Ricotta cheese makes an excellent substitute for Greek yogurt. Use part-skim ricotta for similar light results. Cottage cheese blended until smooth also works well in this filling.
- → How do I store leftovers?
Store cooled stuffed shells in an airtight container in the refrigerator for 3-4 days. Reheat individual portions in the microwave for 2-3 minutes or cover with foil and warm in a 350°F oven.
- → Can I freeze these stuffed shells?
Assemble and freeze before baking. Wrap the baking dish tightly with plastic wrap and foil, then freeze for up to 3 months. Thaw overnight in the refrigerator before baking as directed.
- → What's the best way to shred the chicken?
Use two forks to pull cooked chicken breast apart into fine shreds. Rotisserie chicken works perfectly and saves time. For best texture, shred while the chicken is still slightly warm.