 Save
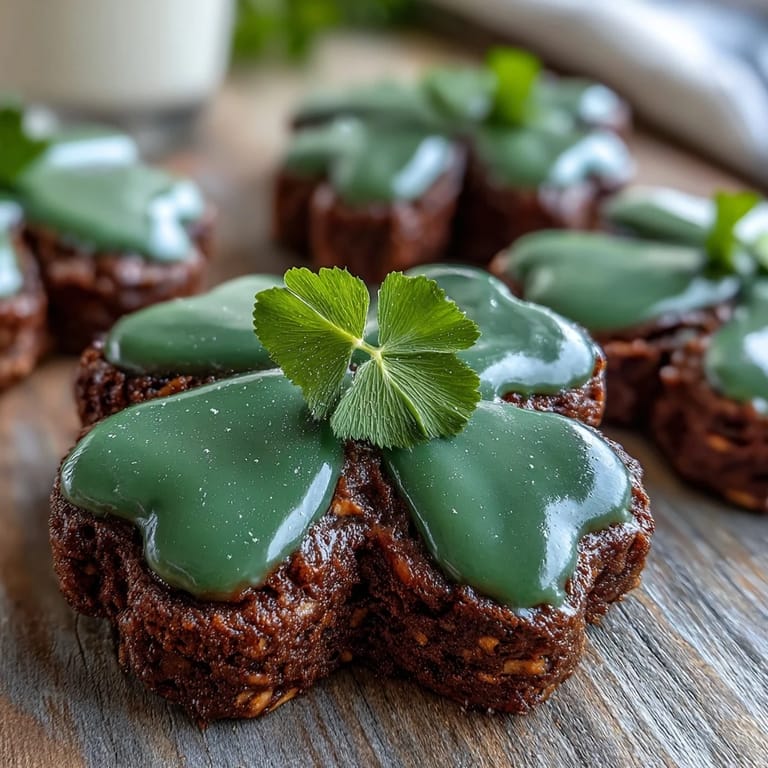
Save My kitchen smelled like butter and vanilla the morning my daughter insisted we bake shamrock cookies for her classroom party. She was seven, armed with a green marker and a sketch of what she imagined these cookies should look like, and somehow I agreed to make them from scratch despite never having piped royal icing before. That first batch taught me patience—and that sometimes the wobbliest cookies taste just as good as the perfect ones. Now every March, that same kitchen fills with the sound of the mixer whirring and her voice asking if we can make them even greener this year.
I brought a box of these to my neighbor's St. Patrick's Day gathering last spring, nervous because I'd attempted that tricky royal icing for only the second time. A woman I'd never met before picked one up, took a bite, and immediately asked for the recipe—then came back the next day saying she'd already made a batch with her granddaughter. That's when I realized these cookies do something special: they bring people together in the kitchen, not just at the table.
Ingredients
- All-purpose flour: This is your foundation, and weighing it (315 g) gives you consistency that volume measurements sometimes miss—I learned this after a batch of tough cookies taught me why bakers trust their scales.
- Unsalted butter: Softened butter creams into the sugar like a dream, creating that light, fluffy texture that makes these cookies melt on your tongue instead of crumbling.
- Granulated sugar: The sweetness here is balanced—not cloyingly so—which lets the vanilla and almond notes shine without overwhelming your palate.
- Egg: This binds everything together and gives the cookies just enough structure to hold that shamrock shape while staying tender inside.
- Vanilla and almond extracts: The vanilla is essential, but the almond extract is your secret weapon—it adds a whisper of sophistication that people notice but can't quite name.
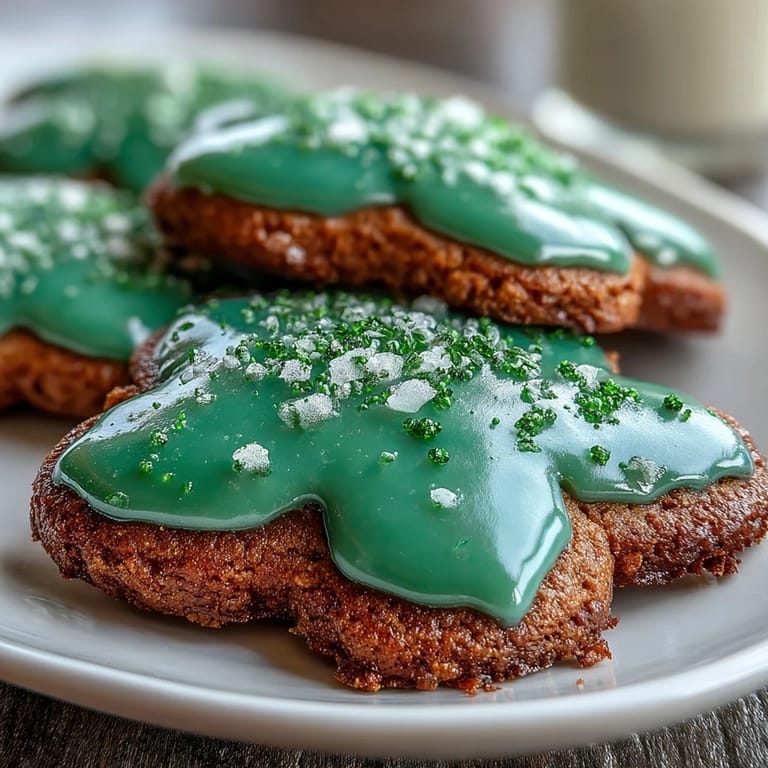
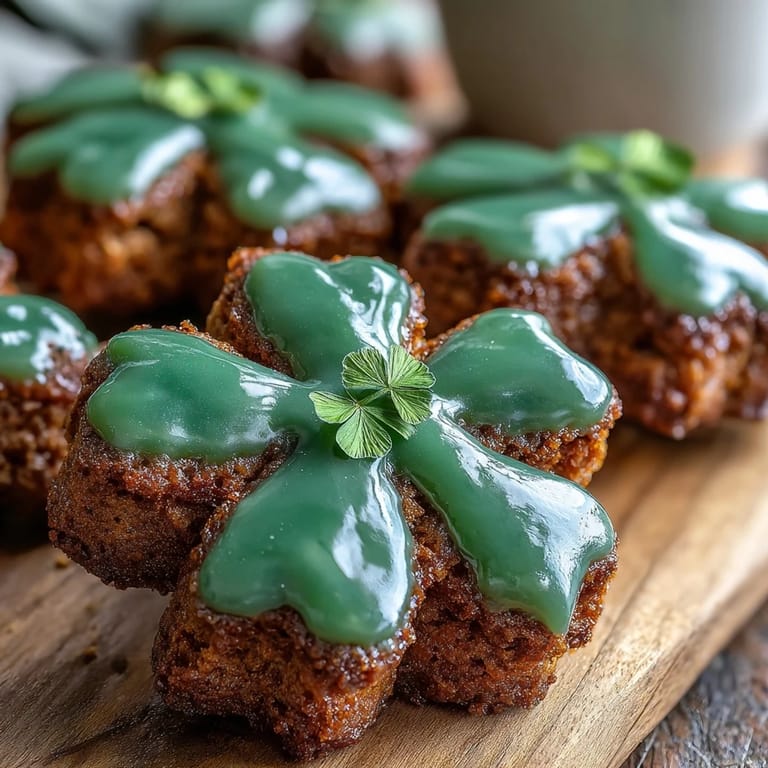
- Powdered sugar and meringue powder: These create royal icing that sets firm enough to pipe but stays glossy and beautiful; meringue powder is worth hunting down because it prevents weeping.
- Green gel food coloring: Gel colors produce that vivid, true green without watering down your icing like liquid dyes do—the difference is genuinely noticeable.
Tired of Takeout? 🥡
Get 10 meals you can make faster than delivery arrives. Seriously.
One email. No spam. Unsubscribe anytime.
Instructions
- Mix Your Dry Goods:
- Whisk flour, baking powder, and salt together in a medium bowl and set it aside—this small step prevents lumps and ensures even leavening throughout your dough.
- Cream Butter and Sugar:
- Beat softened butter with sugar for about two minutes until the mixture looks pale and fluffy; this incorporates air that makes the cookies tender rather than dense. You'll know you're there when it looks almost like frosting.
- Incorporate Wet Ingredients:
- Add the egg and extracts, beating until everything is combined and smooth—don't overmix here or you'll develop gluten and end up with tough cookies.
- Bring the Dough Together:
- Gradually add your dry ingredients to the wet, mixing just until the dough comes together; stop as soon as you don't see flour streaks. Overmixing is the enemy of tender cookies.
- Chill the Dough:
- Divide into two discs, wrap tightly in plastic wrap, and refrigerate for at least an hour—this resting time lets the flour fully hydrate and makes the dough much easier to roll and cut. I often chill mine overnight.
- Prepare for Baking:
- Preheat your oven to 350°F and line your baking sheets with parchment paper—this ensures even browning and makes cleanup a breeze. Let the oven reach temperature fully before you start baking.
- Roll and Cut:
- On a lightly floured surface, roll dough to about 1/4 inch thick and cut out shamrock shapes with a sharp cutter; place them an inch apart on your prepared sheets. Dough scraps can be gathered, chilled, and re-rolled once more without toughening.
- Bake Until Golden:
- Bake for 8 to 10 minutes—the cookies should be pale with edges just beginning to turn golden, not brown. They'll continue cooking slightly on the hot pan, so don't overbake or they'll lose that tender crumb.
- Cool Properly:
- Let them sit on the pan for five minutes to firm up, then transfer to a wire rack to cool completely; this prevents them from breaking and ensures they're fully set before you ice them.
- Make the Royal Icing:
- Combine sifted powdered sugar with meringue powder, add room-temperature water and vanilla, then beat on low speed for 5 to 7 minutes until smooth and glossy. The consistency should be thick enough to hold peaks but thin enough to spread.
- Color Your Icing:
- Add green gel coloring drop by drop until you reach your desired shade—gel colors are potent, so start with less than you think you need. Mix thoroughly to avoid streaks.
- Decorate and Set:
- Transfer icing to a piping bag with a small round tip, outline each cookie first, then fill in the center by piping back and forth; let it set for at least an hour before serving. The icing will harden to a crisp, beautiful finish.
 Save
Save These cookies taught me that baking isn't just about following instructions—it's about being present in the kitchen, noticing when things smell right, and trusting yourself enough to try something that seems fancy but is actually quite manageable. When someone bites into a cookie you've piped and decorated yourself, there's a quiet pride in that moment.
The Secret of Tender Cookies
The difference between cookies that shatter when you bite them and cookies that have that perfect crumb comes down to three things: not overmixing your dough, not overbaking, and using the right oven temperature. I learned this by trial and error, and now I always check my oven with a thermometer because most ovens run hotter or cooler than they claim. It's a small step that changed everything.
Royal Icing Secrets
Royal icing seems intimidating until you understand that it's really just powdered sugar, meringue powder, water, and beating—lots of beating. The meringue powder is crucial because it stabilizes the mixture and keeps it from breaking down as it sits. I once tried to skip it to save a few dollars, and the icing turned grainy and separated; never again.
Storage and Make-Ahead Tips
These cookies are generous enough to be made several days in advance, which is honestly why I love them for parties and gatherings. Store them in an airtight container at room temperature, and they'll stay fresh and crisp for up to a week—though they rarely last that long in my house.
- Bake the cookies up to three days ahead and store them undecorated in an airtight container; decorate them the morning of your event for the freshest-looking presentation.
- The royal icing can be made up to two days ahead if you keep it covered tightly with plastic wrap pressed directly onto the surface to prevent it from drying out.
- If you want extra sparkle, sprinkle edible gold glitter or shamrock-shaped sprinkles onto the wet icing before it sets for a festive finishing touch.
 Save
Save Making these shamrock cookies has become my small tradition, a way to bring a little intentional sweetness into March and into the lives of people I care about. There's something magic about sharing food you've made with your own hands.
Recipe FAQs
- → What is the best way to roll out the dough evenly?
Chill the dough thoroughly before rolling. Use a lightly floured surface and rolling pin, aiming for a 1/4-inch thickness to ensure even baking.
- → How do I achieve a smooth and glossy royal icing?
Beat powdered sugar and meringue powder with water and vanilla on low speed for 5-7 minutes until the mixture is smooth, thick, and glossy.
- → Can I substitute almond extract in the dough?
Yes, almond extract is optional and can be omitted or replaced with additional vanilla extract for a milder flavor.
- → How long should the decorated cookies dry before serving?
Allow the green royal icing to set for at least 1 hour at room temperature to ensure it hardens properly before handling.
- → What is the recommended storage method for these cookies?
Store cookies in an airtight container at room temperature for up to one week to maintain freshness and texture.
- → How can I add extra decoration to the icing?
Sprinkle edible gold glitter or colored sprinkles over wet icing to add festive sparkle and texture.