 Save
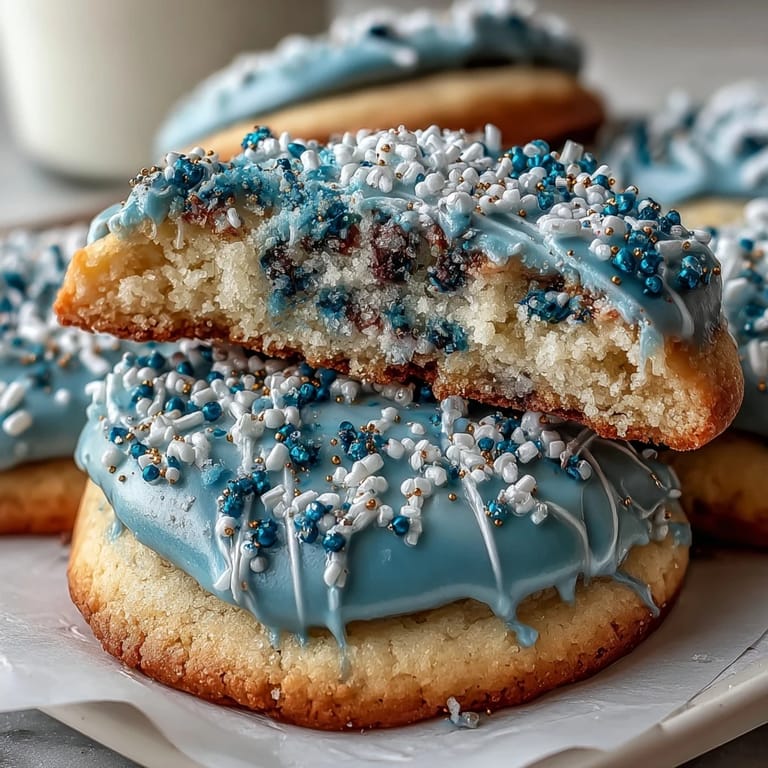
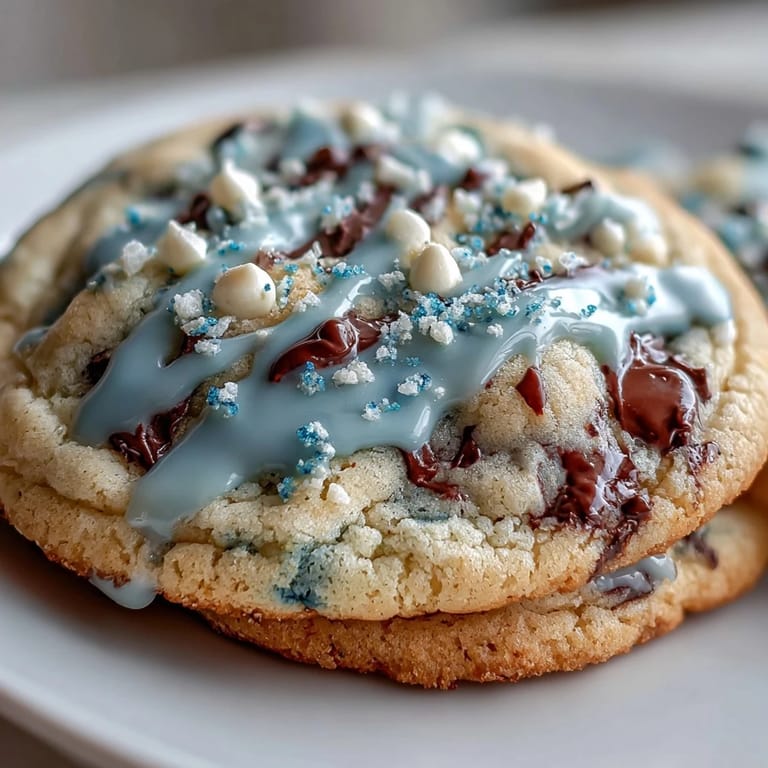
Save There's something magical about baking cookies that feel like they belong in a storybook—and Pure Vanilla Cookie from Cookie Run Kingdom has that exact enchantment. My kitchen smelled like vanilla heaven the first afternoon I decided to recreate these elegant treats, and watching the dough transform into glossy, decorated masterpieces felt oddly therapeutic. The game's soft blue and gold aesthetic inspired me to try my hand at royal icing, which honestly seemed intimidating until I realized it's just patience and steady hands. Now these cookies are my go-to when I want to impress someone or just treat myself to something that tastes as good as it looks.
I brought a batch of these to a Cookie Run Kingdom-themed birthday party last spring, and the host nearly cried when she saw them arranged on a platter in blue and gold. Someone asked if I'd bought them from a professional baker, which sounds like a small compliment until you realize it means they actually looked bakery-quality. That moment cemented it for me—these cookies aren't just fun to make, they're genuinely impressive on a table.
Ingredients
- All-purpose flour (2 1/2 cups): This is your foundation—make sure it's fresh and not packed down when you measure, or your cookies might turn out dense instead of tender.
- Baking powder (1/2 tsp): Just enough to give the cookies a subtle lift without making them cake-like.
- Salt (1/4 tsp): Never skip this tiny amount; it makes the vanilla flavor pop in a way that feels almost invisible but makes all the difference.
- Unsalted butter (3/4 cup, softened): Soft butter creams beautifully with sugar and creates that signature tender crumb—cold butter will fight you the whole way.
- Granulated sugar (1 cup): This sweetness is balanced by the vanilla, so don't be tempted to add more or the cookies become too sweet and lose their elegance.
- Egg (1 large): Room temperature eggs incorporate more smoothly into your dough, creating a better texture.
- Pure vanilla extract (2 tsp plus 1/2 tsp): Vanilla is the star here, so use real extract—the imitation kind just doesn't capture that pure, delicate flavor the cookies are named for.
- Milk (1 tbsp): This tiny bit of moisture keeps the dough workable without making it greasy.
- Powdered sugar (2 cups, sifted): Sifting removes lumps that would create grainy, uneven icing.
- Meringue powder (2 tbsp): This stabilizer is what transforms a loose frosting into a glossy, shelf-stable icing that hardens beautifully.
- Warm water (4-5 tbsp): Temperature matters more than you'd think—warm water helps the icing come together smoothly and sets more evenly.
- Gel food coloring (optional): Gel colors are more concentrated than liquid, so you won't thin out your icing when you add them.
Tired of Takeout? 🥡
Get 10 meals you can make faster than delivery arrives. Seriously.
One email. No spam. Unsubscribe anytime.
Instructions
- Prepare your dry ingredients:
- Whisk flour, baking powder, and salt together in a medium bowl and set it aside—this ensures even distribution of the leavening agent throughout your dough. I like to whisk for about a minute to incorporate a little air.
- Cream the butter and sugar:
- Beat softened butter with granulated sugar until the mixture is pale, fluffy, and noticeably lighter in color, which takes about 2 to 3 minutes with an electric mixer. You'll notice the texture change from grainy to smooth—that's when you know the sugar has partially dissolved and incorporated air, which creates the tender cookie texture.
- Add the wet ingredients:
- Mix in the egg, vanilla extract, and milk until everything is combined and smooth. Don't overmix here—just beat until you don't see any streaks of egg.
- Bring the dough together:
- Gradually add your whisked dry ingredients to the wet mixture, stirring on low speed just until the dough comes together without any visible flour streaks. This prevents overworking the gluten, which would make your cookies tough instead of tender.
- Chill the dough:
- Divide the dough in half, flatten each portion into a disk, wrap tightly in plastic wrap, and refrigerate for at least 1 hour, or until the dough is firm enough to roll without sticking. I sometimes chill mine overnight because it makes rolling easier and the cookies taste even better.
- Preheat and prepare:
- Set your oven to 350°F and line your baking sheets with parchment paper—this prevents sticking and ensures even browning on the bottom.
- Roll and cut:
- Dust your work surface lightly with flour, then roll one disk of dough to about 1/4 inch thickness and cut into your desired shapes using cookie cutters. Work quickly but gently; if the dough gets too warm, pop it back in the fridge for 5 minutes.
- Arrange on baking sheets:
- Transfer your cut cookies to the prepared baking sheets, spacing them about 1 inch apart to allow for very slight spreading. I usually use a thin spatula or offset knife to transfer them without breaking.
- Bake until golden:
- Bake for 10 to 12 minutes, watching carefully until the edges are just barely turning golden but the centers still look slightly underbaked—they continue cooking on the hot sheet. This is the secret to cookies that are crisp on the edges but tender in the middle.
- Cool properly:
- Let the cookies cool on the baking sheet for about 5 minutes so they firm up, then transfer them to a wire rack to cool completely before decorating. Decorating warm cookies causes the icing to melt and slide right off.
- Make the royal icing:
- Combine sifted powdered sugar, meringue powder, vanilla extract, and 4 tablespoons of warm water in a large bowl, then beat on low speed with an electric mixer until the mixture is smooth and glossy. Add water 1 teaspoon at a time if you need a thinner consistency for flooding, or leave it thicker for piping details.
- Color your icing:
- Divide the icing into separate bowls and add gel food coloring drop by drop, stirring gently until you reach your desired shade. Remember that the color darkens slightly as the icing dries.
- Decorate with patience:
- Using piping bags or squeeze bottles, decorate your completely cooled cookies with your chosen colors and designs—the glossy finish creates that bakery-quality look. Allow the icing to set for several hours or overnight before stacking or storing.
 Save
Save My little cousin asked to help decorate a batch of these cookies, and watching her carefully pipe blue swirls onto white-iced bases reminded me that baking is really about creating moments together, not achieving perfection. She made 'em messy and absolutely beautiful, and those slightly wobbly lines made them her masterpiece.
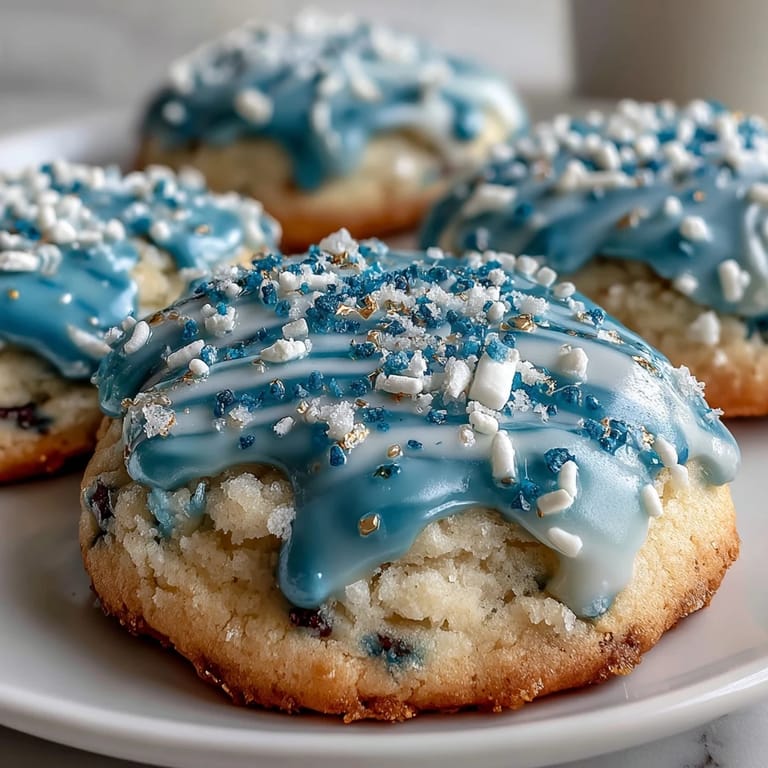
The Pure Vanilla Cookie Aesthetic
If you're planning a Cookie Run Kingdom themed celebration, these cookies are your secret weapon for authenticity. The soft blue, crisp white, and warm gold icing colors mirror the character perfectly, and guests genuinely feel transported when they see a coordinated spread. I learned quickly that having a clear color scheme in mind before you start decorating makes the whole process feel less chaotic and more intentional.
Storage and Gifting
The hard royal icing shell means these cookies can be stacked and layered in boxes without worry—they don't smudge or stick together like soft-frosted cookies do. This makes them perfect for gifting or prepping ahead for parties, and they'll stay fresh and crisp in an airtight container at room temperature for up to a week. I've even decorated a batch three days ahead of a party and they were still beautiful when I served them.
Troubleshooting Your Batch
These cookies are forgiving if you understand a few key moments in the process. Overmixing the dough before baking leads to tough cookies, underbaking creates soft centers that won't hold up well to icing, and icing that's mixed too long can become grainy instead of glossy. Here's what I've learned from my own kitchen mistakes:
- If your icing is grainy, you likely overbeaten it or used warm icing on warm cookies—always decorate fully cooled cookies and beat your icing just until smooth.
- If cookies spread too much, your dough was too warm or didn't chill long enough, so next time extend the chilling time to 1.5 hours.
- If the icing won't set, your kitchen might be humid or the icing was too thin, so let them sit uncovered in a cool, dry space for several hours before storing.
 Save
Save These cookies transformed my kitchen into a little bakery corner and reminded me why I love baking—it's really just controlled chaos that somehow turns into something beautiful and delicious. Make them with intention, decorate them with joy, and watch how quickly they disappear.
Recipe FAQs
- → What ensures the cookies stay soft but firm?
Chilling the dough for at least an hour before baking helps control spread, resulting in soft but firm cookies.
- → How is the royal icing prepared for decoration?
Powdered sugar, meringue powder, vanilla, and water are mixed until smooth and glossy, achieving the right consistency for piping and decorating.
- → What colors suit the thematic decoration?
Using blue, white, and gold/yellow gel food coloring reflects the classic themed style perfectly.
- → How should decorated cookies be stored?
Keep them in an airtight container at room temperature to maintain freshness for up to one week.
- → Can these cookies be stacked after icing?
Yes, the royal icing hardens to a firm finish, allowing cookies to be stacked safely without damage.