 Save
Save I discovered these little taco cups by accident one Friday when I was scrambling to feed a group of friends who were dropping by unannounced. I had tortillas, ground beef, and cheese on hand, but the thought of standing over the stove making individual tacos felt exhausting. Then I remembered a muffin tin sitting in my cabinet and thought, why not try baking them? Twenty minutes later, crispy golden cups emerged from the oven, and my friends couldn't stop reaching for them. What started as a desperate improvisation became my go-to recipe for any gathering.
I'll never forget watching my sister's kids devour these at a casual Sunday dinner. They each grabbed a cup, dipped it in salsa like it was a game, and suddenly the platter was empty. My brother-in-law joked that he'd finally found a taco he could eat with one hand while holding a beer, and honestly, that's when I knew this recipe was a keeper.
Ingredients
- Ground beef: I use 250 g because it fills the cups generously without overflowing, though turkey works just as well if you prefer something leaner.
- Small onion and garlic: These are your flavor foundation, and mincing them finely means they cook into the meat rather than leaving chunks.
- Chili powder, cumin, paprika, salt, and black pepper: This blend builds warmth and depth without being too spicy, but you can adjust to your heat preference.
- Small flour tortillas: Street taco size is ideal because they fit the muffin cups naturally, though you can cut larger ones down to about 4 inches if that's what you have.
- Cheddar and Monterey Jack cheese: The combination melts smoothly and tastes more interesting than using just one type, but any melting cheese works in a pinch.
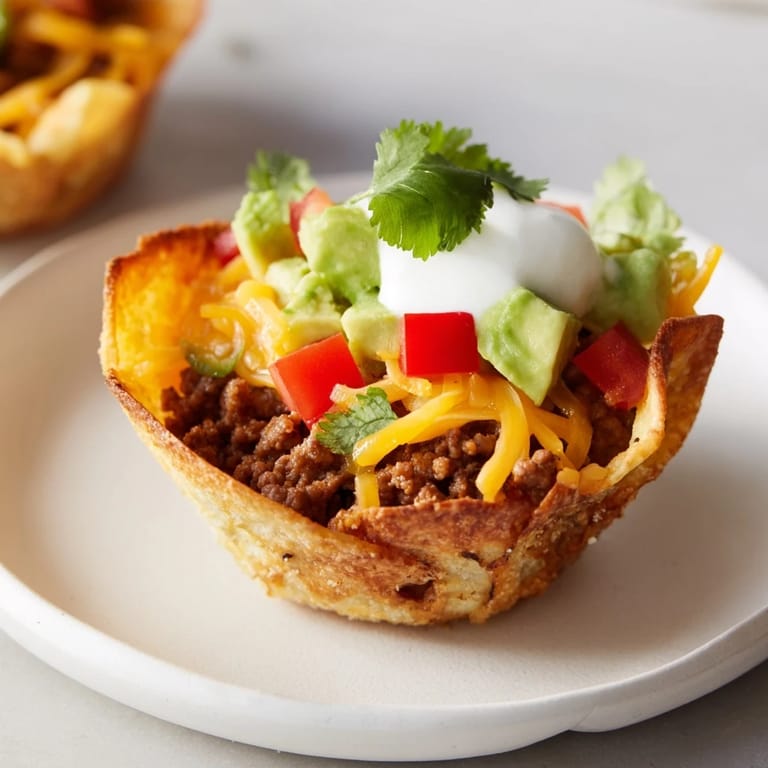
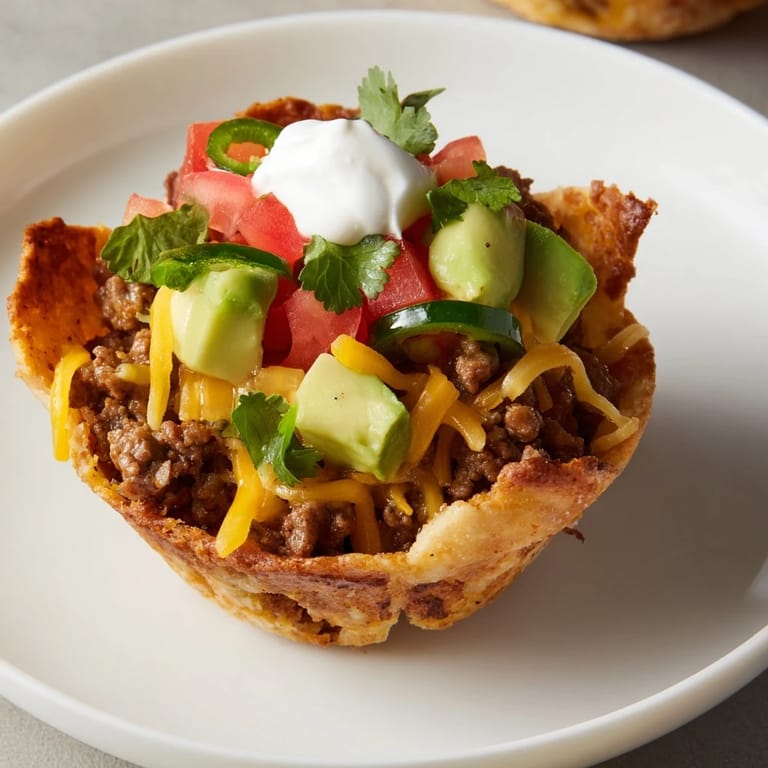
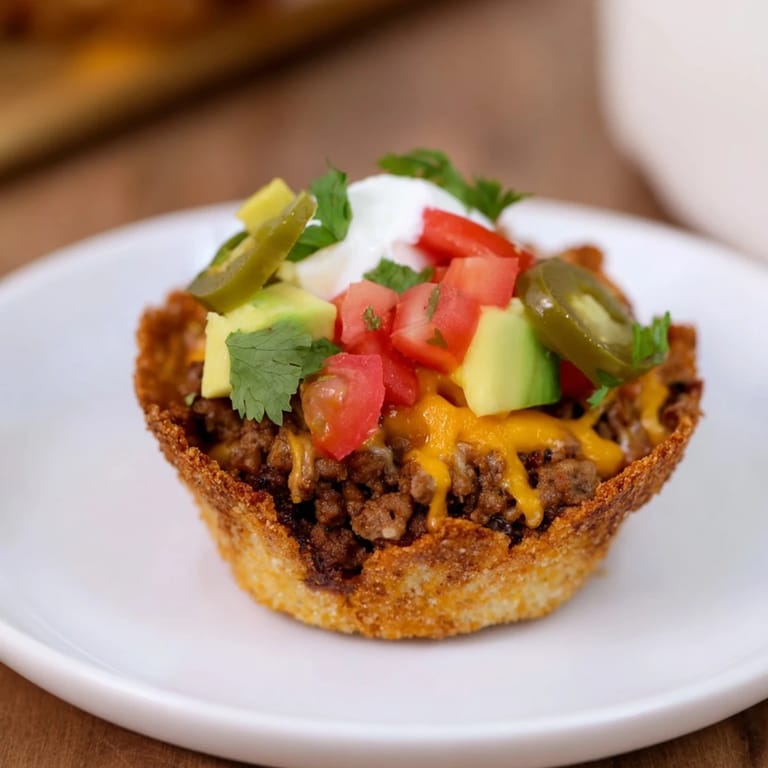
- Toppings: Salsa, sour cream, avocado, cilantro, tomato, and jalapeños are my favorites, but fresh lime, black beans, or corn also make wonderful additions.
Tired of Takeout? 🥡
Get 10 meals you can make faster than delivery arrives. Seriously.
One email. No spam. Unsubscribe anytime.
Instructions
- Prep your pan:
- Preheat your oven to 200°C (400°F) and lightly grease a 12-cup muffin tin with oil or butter so the tortillas release easily after baking.
- Brown the beef:
- Heat a skillet over medium heat and add your ground beef, breaking it up with a spoon as it cooks until it's no longer pink, about 4 to 5 minutes. You'll know it's ready when there are no gray bits left.
- Build your flavor base:
- Stir in your diced onion and cook for 2 minutes until it softens and becomes fragrant, then add the garlic and cook for just 30 seconds so it doesn't burn.
- Season and finish:
- Sprinkle in the chili powder, cumin, paprika, salt, and pepper, stirring well so every bit of beef gets coated in those warm spices. Let it cook for 1 more minute, then remove from heat.
- Shape your cups:
- Carefully press each tortilla round into the muffin tin, folding the edges so they create a little cup shape and sit slightly above the rim. This is where the magic happens—they'll puff and crisp as they bake.
- Fill and top:
- Divide the beef mixture evenly among all 12 cups, then scatter your shredded cheddar and Monterey Jack on top of each one. Don't be shy with the cheese.
- Bake until golden:
- Bake for 10 to 12 minutes until the tortilla edges turn golden and crispy and the cheese melts completely. You'll smell that toasted tortilla aroma when they're nearly ready.
- Cool, top, and serve:
- Let them cool for 3 to 5 minutes so you can handle them without burning your fingers, then crown each cup with your favorite toppings and serve them warm.
 Save
Save These cups have a quiet magic about them. It's not fancy cooking, but there's something wonderful about how a simple muffin tin transforms ordinary ingredients into something people actually get excited about. I've made them for parties, potlucks, and lazy weeknights, and they never fail to disappear.
Why This Recipe Works
Baking tortillas in a muffin tin creates structure and crispness that you can't achieve any other way. The gentle oven heat toasts the tortillas evenly without burning them, and the curved shape of the tin naturally forms the perfect cup. Unlike soft tacos, these hold up beautifully, so your toppings stay put and you get a satisfying crunch with every bite. I've tried making them in a regular baking dish before, and they just don't have the same appeal.
Making Them Your Own
Once you have the basic technique down, these cups become a blank canvas for whatever you're craving. I've made them with seasoned black beans for vegetarian versions, swapped the cheese for pepper jack when I wanted heat, and even tried ground turkey when I wanted something lighter. Some nights I keep the toppings minimal and let the crispy tortilla shine, and other times I pile them high like little edible vessels. The beauty of this recipe is that it adapts to your mood and what's in your kitchen.
Storage and Reheating Tips
These are wonderfully forgiving for make-ahead cooking. You can bake the empty tortilla cups the day before and store them in an airtight container at room temperature, then fill and reheat them whenever you're ready. If you've made them fully assembled, just pop them in a 350°F oven for about 5 minutes to warm through without drying them out. I've found they keep their crispness better than I expected, though I always add fresh toppings right before serving.
- Baked empty cups last up to 3 days and reheat perfectly for last-minute entertaining.
- Add cold toppings just before eating to keep the tortillas crispy and the fresh ingredients fresh.
- If you're bringing these to a potluck, pack the cups and toppings separately, then assemble at the destination.
 Save
Save There's something deeply satisfying about serving food that's practical, delicious, and just a little bit clever. These mini taco cups do all three, and that's why they've earned a permanent spot in my cooking rotation.
Recipe FAQs
- → What type of tortillas work best for these cups?
Small flour tortillas, about 4 inches in diameter, work perfectly to shape these cups and hold the filling without breaking.
- → Can I use ground turkey instead of beef?
Yes, ground turkey or chicken can be substituted for beef, offering a leaner but flavorful option.
- → How can I make these suitable for a vegetarian option?
Replace ground meat with black beans or a plant-based substitute to maintain texture and flavor.
- → What’s the best way to ensure the tortillas crisp up well?
Pressing tortillas firmly into a greased muffin tin and baking at 400°F for 10–12 minutes achieves a crispy texture.
- → Which toppings complement these taco cups best?
Fresh salsa, sour cream, diced avocado, chopped cilantro, and jalapeño slices provide bright, creamy, and spicy contrasts.
- → Can I prepare these cups ahead of time?
You can assemble in advance but bake just before serving to maintain crispiness and freshness.